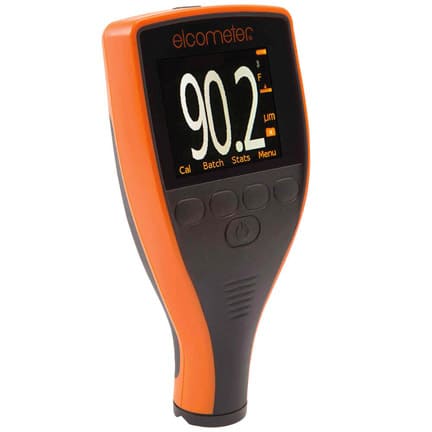
The Paint Coating Thickness Gauge Elcometer 456 sets new standards for measuring the thickness of a coating, helping you to become more efficient.
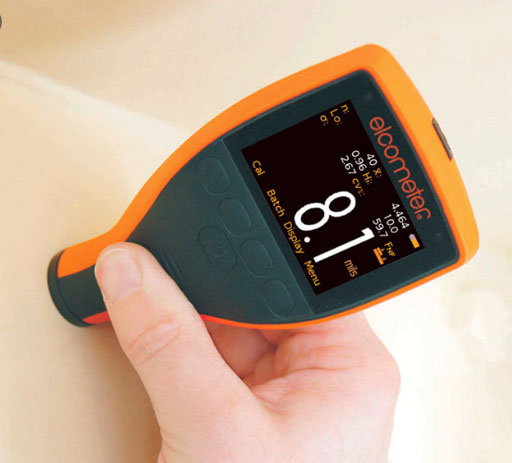
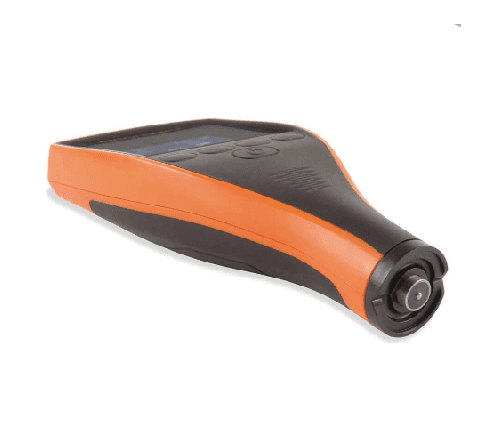
Elcometer 456 is ideal for single-handed operation as the wide footprint of the Bigfoot™ internal probe provides greater stability during dry film thickness measurement – allowing for consistent, repeatable, and accurate results.
Beginning with Model E and ending with Model T, the Elcometer 456 is available in four different models. Each model level offers increased functionality designed to meet your specific needs. Our most advanced model, Model T features memory, alpha-numeric batching, and Bluetooth® communication.

No need to calibrate just select the relevant surface profile and start measuring
Easy to use straight from the box – minimal training required
Readings can be transferred via Bluetooth® or USB to ElcoMaster® or your own software application for instant report generation and record-keeping
USB or Bluetooth® data output to the ElcoMaster® App or your own software application
Easy to use menu structure in multiple languages: English, French, Spanish, German, Chinese & Japanese
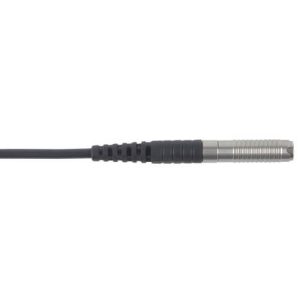
Built-in integral probe for stable, repeatable readings on flat or curved surfaces
Displays 3 individual readings together with their average in microns or mils
Pre-calibrated with 4 profile ranges: Profile Metric Imperial Smooth 0-25µm 0-1mil Fine 25-60µm 1-2mils Medium 60-100µm 2-3mils Coarse >100µm 3-4mils
Specifications:
| Part Number | Description | Certificate |
| A456CFI1-IPC | Elcometer 456 IPC Dry Film Thickness Gauge | ● |
| Built-in probe type | Ferrous | |
| Reading Rate | 70+ readings per minute | |
| Range | 0 – 1500μm (0 – 60mils) | |
| Resolution | 10μm / 1mil (where 5μm / 0.5 mil is rounded up) | |
| Accuracy** | ±5% | |
| Minimum Substrate Thickness | 300μm (12mils) | |
| Operating Temperature | -10 to 50°C (14 to 122°F) | |
| Power Supply | 2 x AA batteries (rechargeable batteries can be used) | |
| Battery Life† | Alkaline: Approx. 16 hours Lithium: Approx. 24 hours | |
| Weight (including batteries) | 156g (5.5oz) | |
| Gauge Dimensions | 141 x 73 x 37mm (5.55 x 2.87 x 1.46″) | |
| Packing List | Elcometer 456 IPC Gauge, calibration foils, wrist harness, protective case, 1 x screen protector, USB cable, test certificate, 2 x AA batteries & user guide. |

STANDARDS: ASTM D7091, ISO 2808, ISO 19840, SSPC PA-2, US Navy NSI 009-32
QUICK TIP:
How to take a reading with Elcometer 456:
1. Whilst holding the gauge perpendicular, gently place the probe onto the surface.
· Do not drag the probe across the surface or bang the probe down hard onto the surface as this will damage the probe tip resulting in inaccurate readings.
· >1500µm’ (’>60mils’) indicates a reading over the probe range.
2. For subsequent readings, lift the probe off and then replace it on the coated surface.
· Do not allow the probe to hover over the surface as this could result in a false reading.
The first reading taken is displayed next to ‘1′, the second next to ‘2′ etc. When the third reading has been taken, the average (mean, xbar) of the three individual readings displayed is shown (X:).
The average (mean, xbar) reading is cleared when a fourth reading is taken.
By selecting ‘Send Individual Readings’ or ‘Send Mean (xbar) Reading’ via Menu/Bluetooth, the user can choose to transfer the individual readings or just the average (mean, xbar) reading values to ® ® ElcoMaster or ElcoMaster Mobile Apps – see Section 7 on page 7.
Download Data Sheet
Download Instruction Manual
VISIT TESTCOATINGS.CA FOR MORE ELCOMETER PRODUCTS
The Paint Coating Thickness Gauge Elcometer 456 sets new standards for measuring the thickness of a coating, helping you to become more efficient.
Elcometer 456 is ideal for single-handed operation as the wide footprint of the Bigfoot™ internal probe provides greater stability during dry film thickness measurement – allowing for consistent, repeatable, and accurate results.
Beginning with Model E and ending with Model T, the Elcometer 456 is available in four different models. Each model level offers increased functionality designed to meet your specific needs. Our most advanced model, Model T features memory, alpha-numeric batching, and Bluetooth® communication.

No need to calibrate just select the relevant surface profile and start measuring
Easy to use straight from the box – minimal training required
Readings can be transferred via Bluetooth® or USB to ElcoMaster® or your own software application for instant report generation and record-keeping
USB or Bluetooth® data output to the ElcoMaster® App or your own software application
Easy to use menu structure in multiple languages: English, French, Spanish, German, Chinese & Japanese
Built-in integral probe for stable, repeatable readings on flat or curved surfaces
Displays 3 individual readings together with their average in microns or mils
Pre-calibrated with 4 profile ranges: Profile Metric Imperial Smooth 0-25µm 0-1mil Fine 25-60µm 1-2mils Medium 60-100µm 2-3mils Coarse >100µm 3-4mils
Specifications:
| Part Number | Description | Certificate |
| A456CFI1-IPC | Elcometer 456 IPC Dry Film Thickness Gauge | ● |
| Built-in probe type | Ferrous | |
| Reading Rate | 70+ readings per minute | |
| Range | 0 – 1500μm (0 – 60mils) | |
| Resolution | 10μm / 1mil (where 5μm / 0.5 mil is rounded up) | |
| Accuracy** | ±5% | |
| Minimum Substrate Thickness | 300μm (12mils) | |
| Operating Temperature | -10 to 50°C (14 to 122°F) | |
| Power Supply | 2 x AA batteries (rechargeable batteries can be used) | |
| Battery Life† | Alkaline: Approx. 16 hours Lithium: Approx. 24 hours | |
| Weight (including batteries) | 156g (5.5oz) | |
| Gauge Dimensions | 141 x 73 x 37mm (5.55 x 2.87 x 1.46″) | |
| Packing List | Elcometer 456 IPC Gauge, calibration foils, wrist harness, protective case, 1 x screen protector, USB cable, test certificate, 2 x AA batteries & user guide. |

STANDARDS: ASTM D7091, ISO 2808, ISO 19840, SSPC PA-2, US Navy NSI 009-32
QUICK TIP:
How to take a reading with Elcometer 456:
1. Whilst holding the gauge perpendicular, gently place the probe onto the surface.
· Do not drag the probe across the surface or bang the probe down hard onto the surface as this will damage the probe tip resulting in inaccurate readings.
· >1500µm’ (’>60mils’) indicates a reading over the probe range.
2. For subsequent readings, lift the probe off and then replace it on the coated surface.
· Do not allow the probe to hover over the surface as this could result in a false reading.
The first reading taken is displayed next to ‘1′, the second next to ‘2′ etc. When the third reading has been taken, the average (mean, xbar) of the three individual readings displayed is shown (X:).
The average (mean, xbar) reading is cleared when a fourth reading is taken.
By selecting ‘Send Individual Readings’ or ‘Send Mean (xbar) Reading’ via Menu/Bluetooth, the user can choose to transfer the individual readings or just the average (mean, xbar) reading values to ® ® ElcoMaster or ElcoMaster Mobile Apps – see Section 7 on page 7.
Download Data Sheet
Download Instruction Manual
VISIT TESTCOATINGS.CA FOR MORE ELCOMETER PRODUCTS


