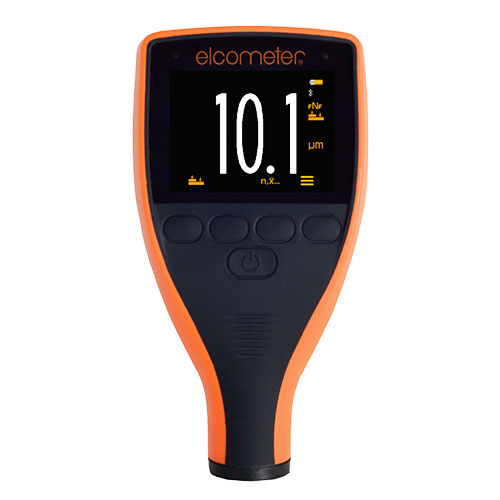
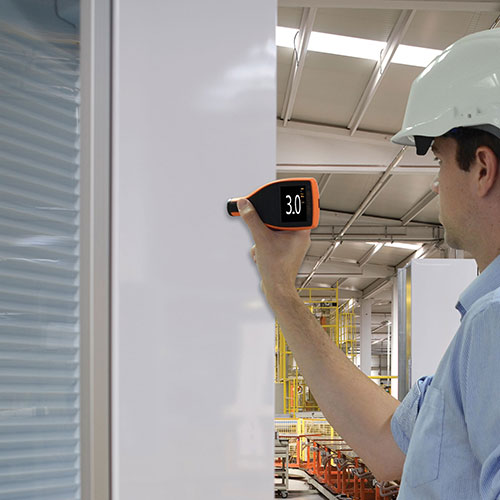
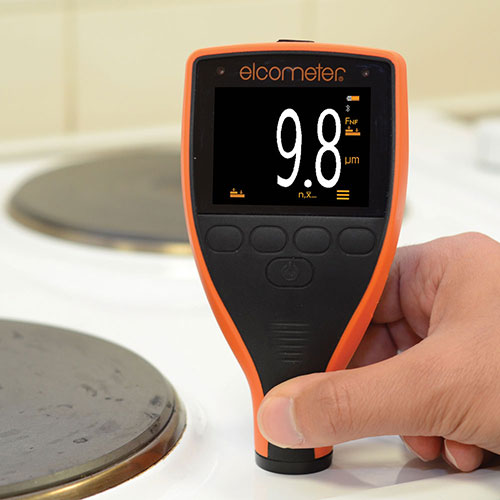
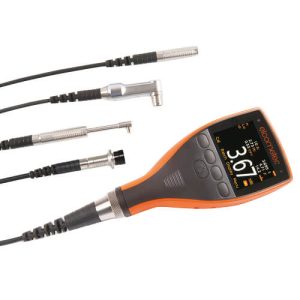
The Digital Powder & Paint Gauge provides a simple, accurate, and reliable way to measure coatings on all smooth ferrous and non-ferrous metal surfaces.
The paint gauge auto-switches to read on either ferrous or non-ferrous substrates. This is ideal for measuring paint or powder on both steel and aluminum surfaces such as car body panels or in a powder shop.

Ideal for:
- industrial paint & powder coating thickness
- flat or curved surfaces
- smooth & thin substrates
- automatically switching between ferrous & non-ferrous substrates
Key features
- Zero or smooth (2 points) calibration ensures accuracy on smooth & thin coated substrates
- Easy to use, ergonomic design provides maximum comfort for continuous use
- Incredibly fast (60+ readings per minute), reducing inspection times, increasing productivity
- Measures cured paint & powder coatings up to 1000µm (40mils)
- Auto-rotating, large, color display provides high visibility whatever the angle of measurement
- Scratch, solvent & water-resistant display protects against the elements
- Rugged & resistant to dust or powder coatings equivalent to IP64, ideal for modern industrial & powder coating environments
- Switches instantly between ferrous & non-ferrous substrates without interruption1
Specifications – Digital Powder & Paint Gauge
| Model B | Model T | Model T | |
| Part Number | A415CFBI | A415CFTI | A415CFNFTI |
| Calibration Test Certificate | • | • | • |
| Built-in Probe Type | Steel (F) |
Steel (F) |
Steel & Aluminium (FNF) |
| Fast accurate reading rate; 60+ readings per minute |
■ | ■ | ■ |
| On-screen statistics Number of readings, n; Average (mean), x; Lowest reading, Lo Highest reading, Hi |
■ | ■ | ■ |
| Live data output | USB | Bluetooth® & USB |
Bluetooth® & USB |
| Measurement Range | 0-1000µm / 0-40mils | ||
| Accuracy (whichever is greater) | ±1-3% or ±2.5μm (±0.1mil) | ±1-3% or ±2.5μm (±0.1mil) | ±1-3% or ±2.5μm (±0.1mil) |
| Resolution | 0.01mil: 0-5mils; 0.1mil: 5-40mils | 0.01mil: 0-5mils; 0.1mil: 5-40mils | 0.01mil: 0-5mils; 0.1mil: 5-40mils |
| Operating Temperature | -10 to 50°C / 14 to 122°F | ||
| Relative Humidity (RH) | 0 to 95% | ||
| Power Supply | 2 x AA Batteries or via USB (rechargeable batteries can also be used) |
||
| Gauge Dimensions (h x w x d) | 0 to 95% | ||
| Gauge Weight (including batteries) | 156g / 5.5oz | ||
| Standards | AS2331.1.4, AS/NZS 1580.108.1, ASTM B 499, ASTM D 1186, ASTM D 1400, ASTM D 7091, ASTM E 376, BS 3900-C5-6A, BS 3900-C5-6B, BS 5411-11, BS 5411-3, BS 5599, DIN 50981, DIN 50984, ECCA T1, EN 13523-1, ISO 2360, ISO 2808-12, ISO 2808-6A, ISO 2808-6B, ISO 2808-7C, ISO 2808-7D, JIS K 5600-1-7, NF T30-124 |
||
QUICK TIP:
How to use Elcometer 308 to obtain a reading:
The gauge should be calibrated before taking readings, see Section 7 ‘Calibrating the Gauge’ on page 6. To take a reading:
1. Whilst holding the gauge perpendicular, gently place the probe onto the surface. 4 The reading may be inaccurate if the probe is not held flat against the surface.
2. The coating thickness is shown on the display. 4 ‘>1000µm’ (‘>40mils’) indicates a reading outside the gauge range.
3. For subsequent readings, lift the probe off and then replace it on to the coated surface.
Download Data Sheet
Download Instruction Manual
The Digital Powder & Paint Gauge provides a simple, accurate, and reliable way to measure coatings on all smooth ferrous and non-ferrous metal surfaces.
The paint gauge auto-switches to read on either ferrous or non-ferrous substrates. This is ideal for measuring paint or powder on both steel and aluminum surfaces such as car body panels or in a powder shop.

Ideal for:
- industrial paint & powder coating thickness
- flat or curved surfaces
- smooth & thin substrates
- automatically switching between ferrous & non-ferrous substrates
Key features
- Zero or smooth (2 points) calibration ensures accuracy on smooth & thin coated substrates
- Easy to use, ergonomic design provides maximum comfort for continuous use
- Incredibly fast (60+ readings per minute), reducing inspection times, increasing productivity
- Measures cured paint & powder coatings up to 1000µm (40mils)
- Auto-rotating, large, color display provides high visibility whatever the angle of measurement
- Scratch, solvent & water-resistant display protects against the elements
- Rugged & resistant to dust or powder coatings equivalent to IP64, ideal for modern industrial & powder coating environments
- Switches instantly between ferrous & non-ferrous substrates without interruption1
Specifications – Digital Powder & Paint Gauge
| Model B | Model T | Model T | |
| Part Number | A415CFBI | A415CFTI | A415CFNFTI |
| Calibration Test Certificate | • | • | • |
| Built-in Probe Type | Steel (F) |
Steel (F) |
Steel & Aluminium (FNF) |
| Fast accurate reading rate; 60+ readings per minute |
■ | ■ | ■ |
| On-screen statistics Number of readings, n; Average (mean), x; Lowest reading, Lo Highest reading, Hi |
■ | ■ | ■ |
| Live data output | USB | Bluetooth® & USB |
Bluetooth® & USB |
| Measurement Range | 0-1000µm / 0-40mils | ||
| Accuracy (whichever is greater) | ±1-3% or ±2.5μm (±0.1mil) | ±1-3% or ±2.5μm (±0.1mil) | ±1-3% or ±2.5μm (±0.1mil) |
| Resolution | 0.01mil: 0-5mils; 0.1mil: 5-40mils | 0.01mil: 0-5mils; 0.1mil: 5-40mils | 0.01mil: 0-5mils; 0.1mil: 5-40mils |
| Operating Temperature | -10 to 50°C / 14 to 122°F | ||
| Relative Humidity (RH) | 0 to 95% | ||
| Power Supply | 2 x AA Batteries or via USB (rechargeable batteries can also be used) |
||
| Gauge Dimensions (h x w x d) | 0 to 95% | ||
| Gauge Weight (including batteries) | 156g / 5.5oz | ||
| Standards | AS2331.1.4, AS/NZS 1580.108.1, ASTM B 499, ASTM D 1186, ASTM D 1400, ASTM D 7091, ASTM E 376, BS 3900-C5-6A, BS 3900-C5-6B, BS 5411-11, BS 5411-3, BS 5599, DIN 50981, DIN 50984, ECCA T1, EN 13523-1, ISO 2360, ISO 2808-12, ISO 2808-6A, ISO 2808-6B, ISO 2808-7C, ISO 2808-7D, JIS K 5600-1-7, NF T30-124 |
||
QUICK TIP:
How to use Elcometer 308 to obtain a reading:
The gauge should be calibrated before taking readings, see Section 7 ‘Calibrating the Gauge’ on page 6. To take a reading:
1. Whilst holding the gauge perpendicular, gently place the probe onto the surface. 4 The reading may be inaccurate if the probe is not held flat against the surface.
2. The coating thickness is shown on the display. 4 ‘>1000µm’ (‘>40mils’) indicates a reading outside the gauge range.
3. For subsequent readings, lift the probe off and then replace it on to the coated surface.
Download Data Sheet
Download Instruction Manual


